
Make OBS Smarter with Advanced Scene Switcher
No matter if you’re live streaming, recording a video, or running a multi-camera podcast, switching scenes manually in OBS can be repetitive and time-consuming. Advanced Scene Switcher is an OBS plugin that automates scene changes based on rules you set—making your workflow smarter, faster, and more flexible.
In this guide, we’ll show you how to install the plugin, create your first macro, and start automating scene switching for any production scenario.
Table of Contents
What Advanced Scene Switcher Does?
Advanced Scene Switcher is a plugin for OBS Studio that automates scene changes so you don’t have to manage them manually. It can handle all kinds of automatic triggers, helping you focus on your content:
Timer → Switch scenes on a schedule, like rotating between intro → gameplay → outro automatically.
Activity detection → Automatically switch to the right scene when a specific window or program is active.
Media playback → Switch scenes when a video or audio clip finishes.
Hotkeys / Macros → Combine custom conditions to create almost any automation logic you can think of.
Other triggers → Respond to mouse position, file status, time of day, window focus, or OBS state changes.
Basically, any situation where you want a scene to change automatically, Advanced Scene Switcher can handle it with the right setup. If you haven’t tried it yet, it’s worth downloading from GitHub or the OBS official forums—the plugin is now in the mature 1.3x series and has become a must-have for advanced OBS users.
Install Advanced Scene Switcher
Supported platforms: Windows, macOS, Linux
Follow these steps to get the plugin up and running:
1. Check OBS version
Ensure your OBS is 31.1.1 or higher.
2. Download the plugin
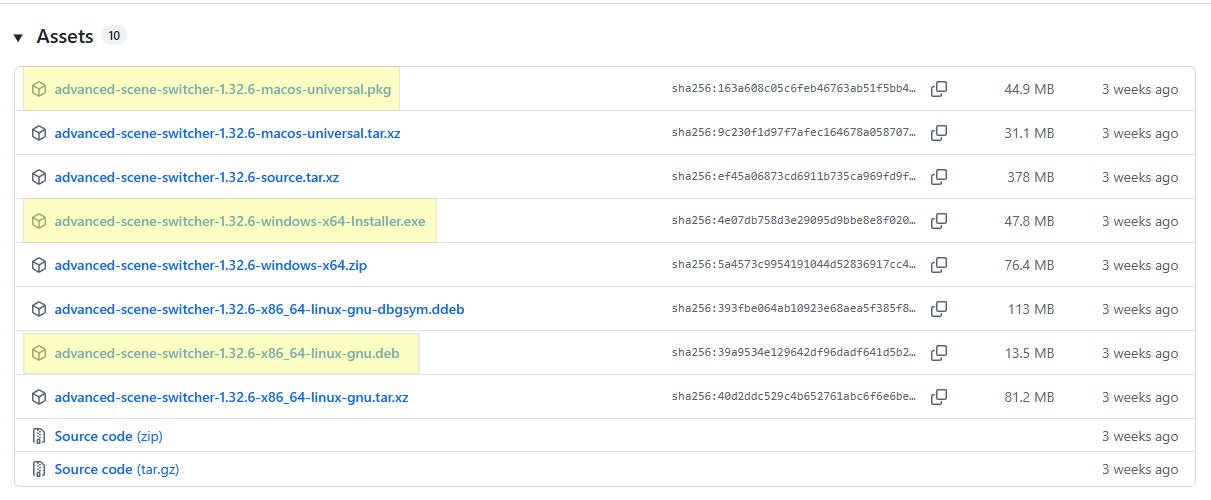
Visit the official GitHub release page and download the latest version for your platform.
Windows:
.exeinstallermacOS:
.pkgLinux:
.deb
3. Run the installer (Windows example)
Keep the default install path. Changing it may prevent OBS from detecting the plugin.
Follow the wizard: Next → Accept license → Next → Install → Finish.
4. Restart OBS
The plugin only appears after a full restart.
5. Open the plugin
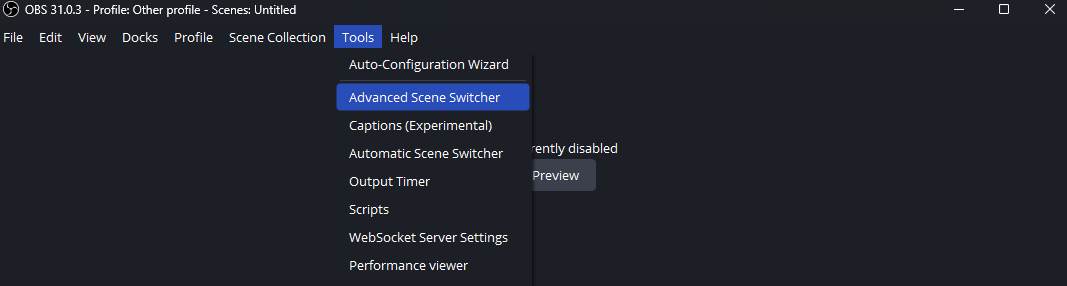
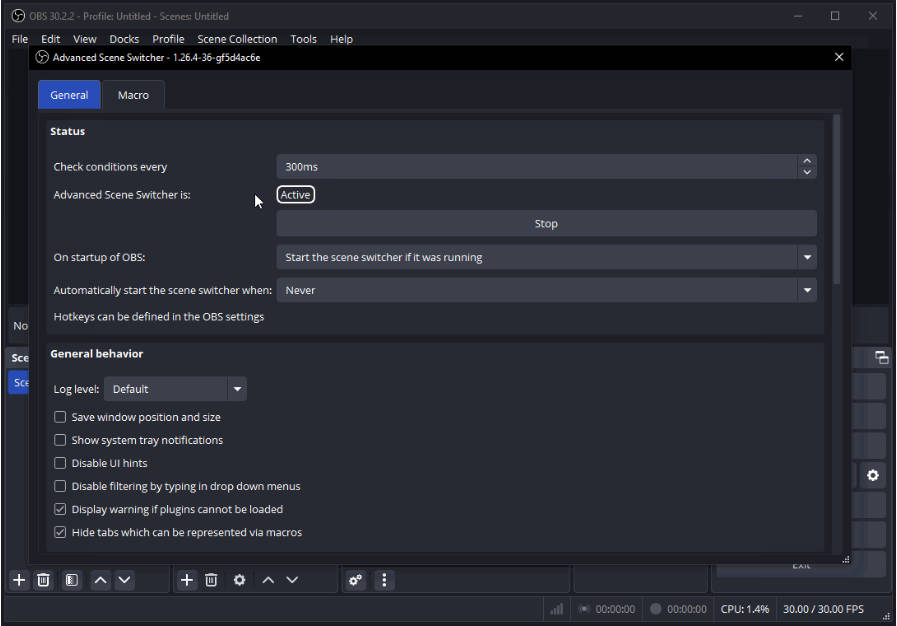
Go to Tools → Advanced Scene Switcher
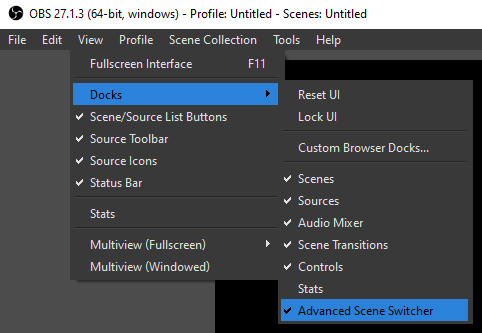
Optional: add a dock via View → Docks → Advanced Scene Switcher
6. Start the plugin
Switch to the General tab and click Start
The status will change to Active
Hotkeys can be configured in Settings → Hotkeys → Advanced Scene Switcher
Macros Tab Overview
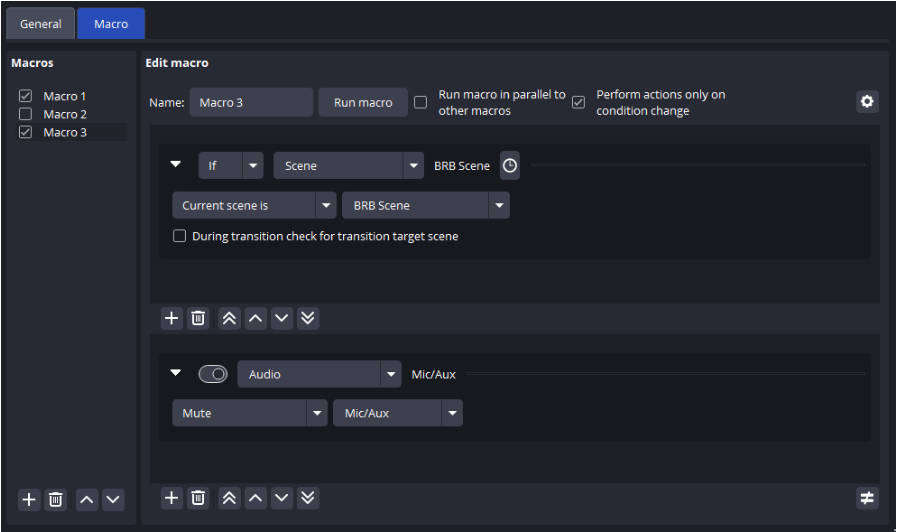
This is where all automation happens. The tab has two main areas:
Left: Macro List
All your automation rules live here. Each macro can be enabled or paused with a checkbox. You can also create, duplicate, or delete macros from this list.Right: Edit Macro
Used to configure the selected macro. Split into two stacked sections:Top: Conditions – defines when the macro triggers
Bottom: Actions – defines what happens after the trigger
Most workflows start with just one condition + one action. You can expand from there as you get familiar with the plugin.
Creating Your First Macro
In this section, we’ll walk you through how to create a new macro, using the example of automatically switching scenes every 10 seconds with a timer trigger.
Step 1: Create a New Macro
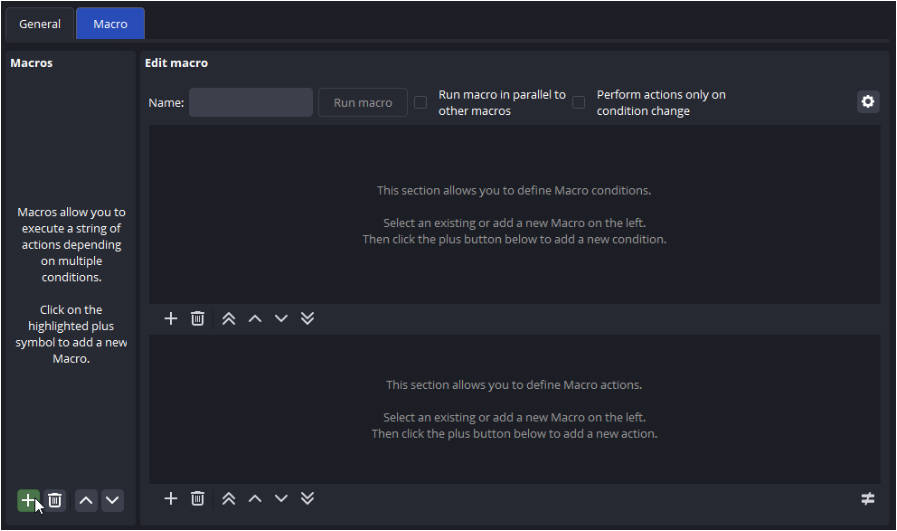
Go to the Macros tab in the Advanced Scene Switcher plugin.
Click the + button in the bottom-left to add a new macro.
Name the macro (e.g., “Timer Scene Switch” or something descriptive).
Step 2: Add a Trigger Condition (Timer)
In the Conditions section, click the + button to add a new condition.
Select Timer from the list of available conditions.
Set the timer to trigger every 10 seconds (or adjust to your desired time interval).
Check the Reset box, so the timer resets after each switch.
Step 3: Define the Action (Switch Scene)
In the Actions section, click the + button to add an action.
Select Switch Scene from the list.
Choose which scene to switch to (e.g., Scene 2).
Choose a transition effect, such as Fade In.
Step 4: Enable the Macro
In the Macro List on the left side, check the box to enable your new macro.
Step 5: Test the Macro
Click Start in the General tab to activate the plugin.
Watch OBS automatically switch to Scene 2 every 10 seconds.
Frequently Asked Questions (FAQ)
After updating to OBS 28, why are my settings and tabs missing?
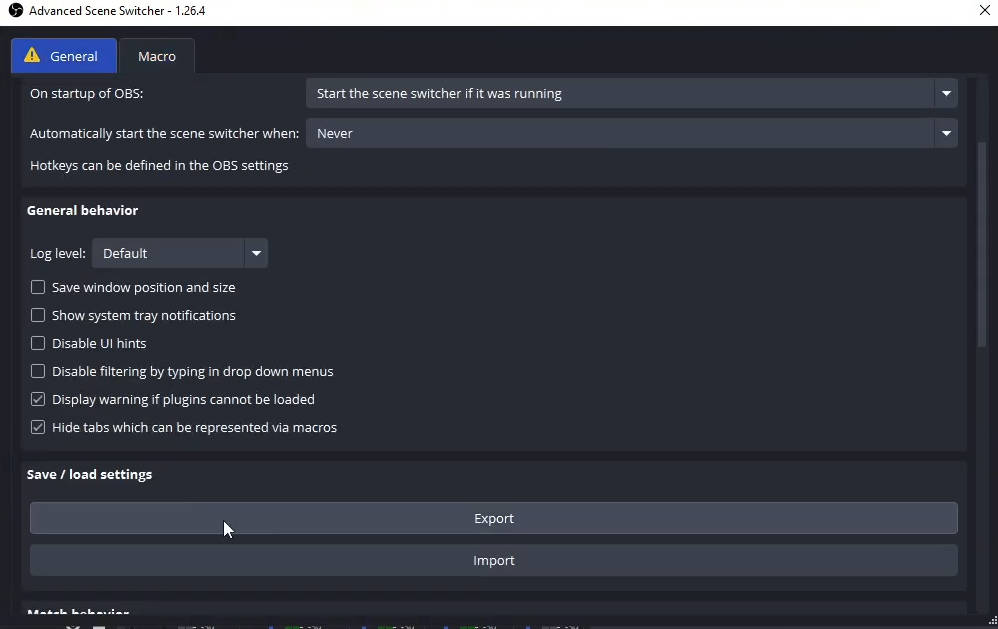
Please navigate to the General tab and uncheck the option labeled “Hide tabs which can be represented via macros.” This will restore the missing tabs.
In which order are macros executed?
Macros are executed from top to bottom in the Macro List. If you have multiple macros with triggered conditions, they will execute in the order they appear: Macro 1 first, followed by Macro 2, and so on.
In which order are macro conditions evaluated?
Conditions are evaluated from top to bottom. For example, if you have conditions like Scene or File and Audio, they will be checked in that order (e.g., Scene or File and Audio).
Recommended OBS Plugins
Here are some community-favorite plugins that can greatly enhance your streaming and production experience. These plugins are great for improving visual effects, audio processing, productivity, and multi-platform distribution.
| Rank | Plugin Name | Main Features & Why It’s Recommended | Download Link (OBS Forum) | CPU/GPU Usage | Best For |
|---|---|---|---|---|---|
| 1 | Move (Move Transition) | Smooth transitions (move, zoom, rotate, fade) between scenes. A must-have for dynamic transitions. | Download here | Low | All streamers, especially those who need dynamic scene transitions |
| 2 | Source Clone | Lossless clone of any source (e.g., game capture, camera) with separate filters and effects. | Download here | Very Low | Those needing multiple filtered versions of the same source (e.g., game with different filters) |
| 3 | Downstream Keyer | Add constant overlays (alerts, logos) on your output without being affected by scene changes. | Download here | Low | Streamers who need persistent overlay elements (e.g., sub-goals, alerts) |
| 4 | Aitum Vertical | Vertical canvas rendering for TikTok, YouTube Shorts, etc., while keeping horizontal output for streams. | Download here | Medium (GPU) | Creators making both horizontal and vertical content |
| 5 | Multiple RTMP Outputs | Stream to multiple platforms (Twitch, YouTube, etc.) with a single click, without third-party software. | Download here | Low-Medium | Multi-platform streamers |
| 6 | Advanced Masks | Powerful masking tools (shapes, gradients, source masks, color correction). | Download here | Low | Advanced users needing complex masking, chroma key, or gradients |
| 7 | Composite Blur | Artistic blur effects: region blur, pixelation, tilt-shift, zoom blur. | Download here | Low-Medium | Those adding artistic blur or background effects |
| 8 | ShaderFilter Plus | A variety of shaders: 3D transforms, rainbow, distortion, CRT effects, etc. | Download here | Medium (GPU) | Visual effect enthusiasts or those using retro CRT effects |
| 9 | SE.Live (StreamElements) | Chat, event feed, alerts, media requests, and royalty-free music integration. | Download here | Low | Gamers or IRL streamers who need integrated alerts and chat |
| 10 | Source Record | Record individual sources (e.g., game only, no overlay) without affecting the main recording. | Download here | Low | Creators needing clean footage for post-editing |
| 11 | Background Removal | Real-time background removal (AI or traditional green screen). | [Search on GitHub or OBS Forum] | Medium (GPU) | Users without a green screen who want virtual backgrounds |
| 12 | Stroke Glow Shadow | Add strokes, glow, and shadows to sources (with alpha). Professional-level UI enhancements. | Download here | Low | Users wanting more polished text, logos, or borders |
Installation Tips:
Always use the .exe installer (automatically detects OBS path).
If the plugin crashes or doesn’t load, backup your scene collection, then delete the plugin folder and reinstall.
Keep your OBS version up to date (32.x+), as newer versions offer better plugin compatibility.
Too many plugins? Use jrDockie to save different dock layouts for editing/streaming.
Recommended Plugin Combos (Based on Use Case)
For Beginners/Daily Streamers:
Move + Source Clone + Downstream Keyer + SE.LiveFor Professional Production/Multiple Camera Angles:
Move + Advanced Masks + Downstream Keyer + Source DockFor Short Video and Multi-platform Streaming:
Aitum Vertical + Multiple RTMP + MoveFor Visual Effects Lovers:
ShaderFilter + Composite Blur + Advanced Masks + Stroke Glow Shadow
Where to Go From Here
Now that you’ve set up your first macro, you can start expanding your automation by adding more conditions. Experiment with different triggers, like time intervals or media playback, to create more refined workflows. Once you’re comfortable with individual conditions, try combining them for even more complex automation.
As you continue to build and refine your macros over time, you’ll find that the more you automate, the smoother your productions become. And once you stop manually switching scenes, it’s hard to go back.
If you’re looking to elevate your live stream even further, consider integrating Telycam’s PTZ cameras with your OBS setup. Our cameras work seamlessly with automation tools like Advanced Scene Switcher, giving you even more control over your production without the need for constant manual adjustments. With Telycam, you can focus more on creating content and less on managing your camera angles.
Contact Telycam
Sales Inquiries
sales@telycam.com
Call Us
+86-755-33275155