
How to Connect OBS to Zoom?

OBS & Telycam Integration
ZOOM

Using OBS with Zoom turns a standard video meeting into a more structured, production-style session. Instead of relying on Zoom alone, OBS acts as a virtual control room—letting you manage layouts, switch visuals, and control what your audience sees.

This setup is popular for teaching, presentations, and recorded meetings, where engagement and structure matter more than casual conversation. In this guide, we’ll show how OBS connects to Zoom and how to record zoom with OBS.

Table of Contents

How to Add Zoom Virtual Camera to OBS Studio?

To use OBS with Zoom, you’ll need OBS Studio, Zoom, and any plug-in that offers a virtual camera. The latest versions of OBS include a built-in virtual camera, so no additional plugins are required.

Follow the steps below to connect OBS to Zoom.

Step 1

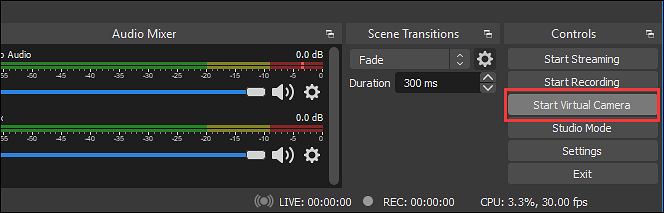
Download and launch the latest version of open broadcaster software studio on your computer. Open OBS and click ‘Start Virtual Camera.’
Step 2

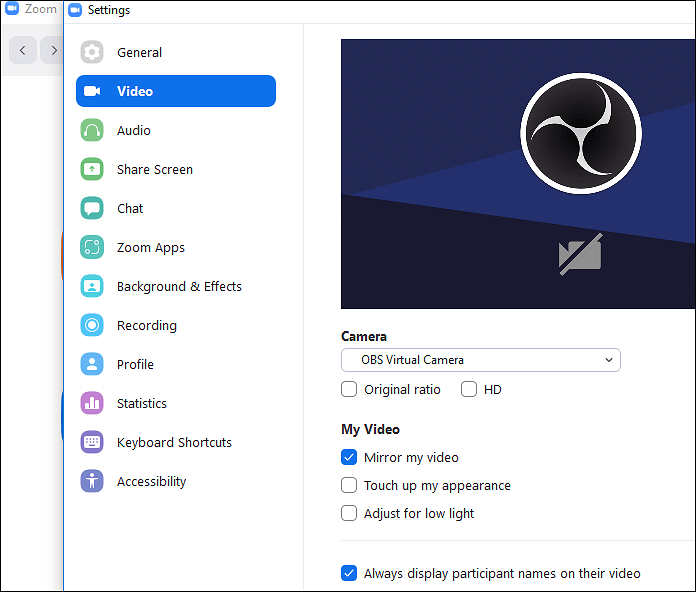
Open the Zoom application and go to settings. Click on ‘Video’ and select ‘OBS Virtual Camera’ provided by OBS studio in the camera option.
Step 3

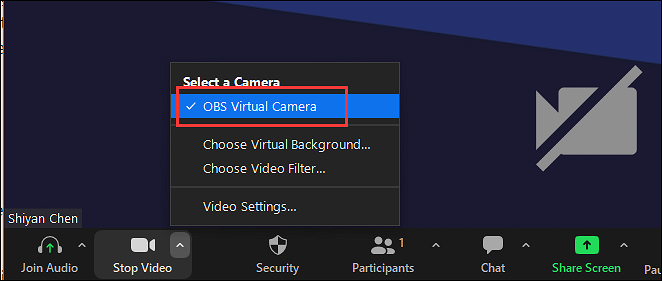
Now, start or join a meeting. Click the arrow up button at the bottom and enable the ‘OBS Virtual Camera’ option.
After adding the virtual camera, you can use OBS functions to adjust scenes, sources, and other properties.

We’ve also prepared a video walkthrough that covers the same setup, including how to add multiple cameras and share files in OBS. If you prefer watching instead of reading, you can check the video below.

Optional: Using NDI Webcam Input with Zoom

If you’re using an NDI-enabled PTZ camera, OBS Virtual Camera isn’t the only way to send video into Zoom.
NDI Webcam Input converts an NDI video source into a virtual webcam that Zoom can recognize like a standard camera.

This approach is useful when you simply need to bring an NDI camera into a Zoom meeting. It does not replace OBS for live production, but offers a more direct option for NDI-based setups. We’ve also prepared a video tutorial below if you’d like to see this workflow in action.

How to Use OBS with Zoom for Audio?

Connecting OBS to Zoom for audio works a little differently than video. Unlike the virtual camera, audio routing requires an additional tool to bridge the two applications.
Once set up, however, the process is straightforward. Follow the steps below to send OBS audio into Zoom reliably.

Step 1: Install the Required Tools

First, download and install the OBS Audio Monitor plug-in from its official website.
Next, install the virtual audio cable software on your computer.

After both installations are complete, restart your computer to ensure the virtual audio devices are properly recognized.

How to Use OBS with Zoom for Audio

Step 2: Configure Audio Settings in Zoom

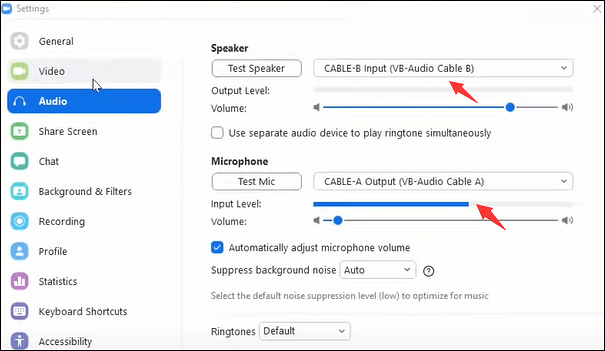
Once your computer restarts, open Zoom and go to Audio Settings.
· Set Cable-A Output (VB-Audio Cable A) as the Microphone
· Set Cable-B Input (VB-Audio Cable B) as the Speaker
Click OK to save the changes.
Step 3: Route Zoom Audio Through OBS

Open OBS Studio and click the “+” button in the Sources panel.
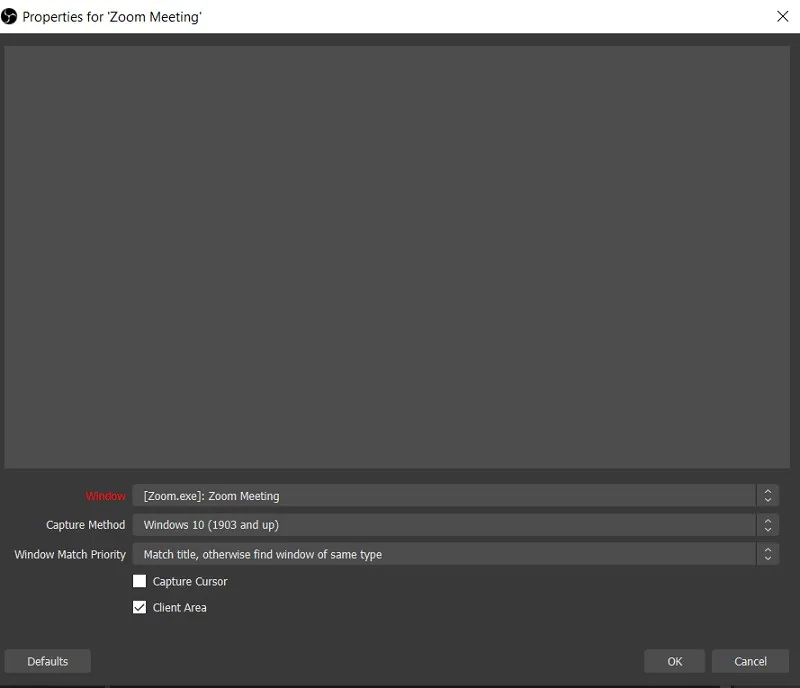
Select Window Capture and choose Zoom from the list.
Next, go to the Audio Mixer panel and click the settings icon.
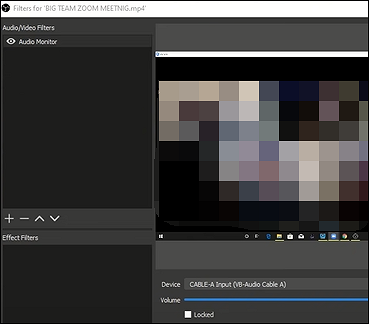
Select Filters, then click “+” and add Audio Monitor.
In the Audio Monitor settings, make sure Cable-A Input is selected as the device.
Step 4: Set the Monitoring Device in OBS

Go to Settings > Audio > Advanced in OBS.
Set Monitoring Device to Cable Input, then click OK.

How to Record Zoom Meetings Using OBS?

You can use OBS to record your Zoom meetings, capturing both video and audio for high-quality recordings. Follow these steps:

Step 1: Set Up Video Capture

Open Zoom and OBS Studio.
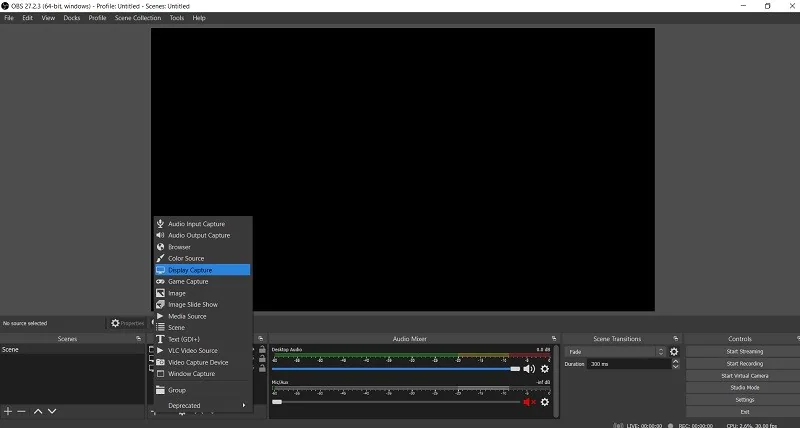
In OBS, go to the Sources panel and click “+”, then select Display Capture.

  • This option is ideal if you use multiple monitors, but works fine with a single monitor as well.

  • Name your source, then click OK.

Use Window Capture

Step 2: (Optional) Use Window Capture

Alternatively, you can use Window Capture and select Zoom.exe as the source.
· This method doesn’t always work reliably, so Display Capture is generally recommended.
· Name the capture and click OK.
OBS Capture Audio

Step 3: Capture Audio

In the Sources panel, click “+” again and choose Audio Input Capture.
· Name it distinctly to avoid confusion with other sources.
· Click OK.
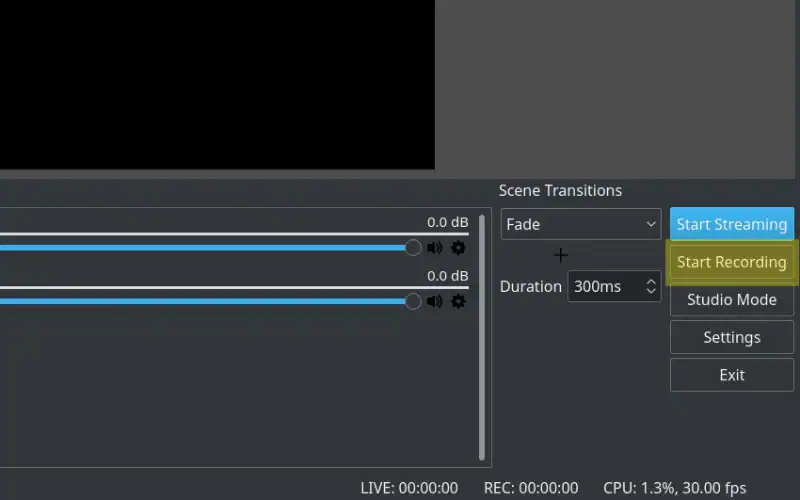
Finally, click Start Recording to begin capturing your Zoom meeting.
Conclusion

With the steps outlined in this guide, you now know how to use OBS features—like the virtual camera and audio routing—to enhance your Zoom meetings. These tools give you more control over video layout, audio, and overall presentation, making your sessions more engaging and professional.

At Telycam, we provide high-quality PTZ cameras, webcam solutions, and accessories designed for video conferencing and live streaming. If you want reliable equipment to improve your Zoom or live-stream setup, feel free to reach out to us for guidance and support.

Contact Telycam

Sales Inquiries

sales@telycam.com

Call Us

+86-755-33275155